Introduction
ownCloud is a file sharing server that permits you to store your personal content, like documents and pictures, in a centralized location, much like Dropbox. The difference with ownCloud is that it is free and open-source, which allows anyone to use and examine it. It also returns the control and security of your sensitive data back to you, thus eliminating the utilization of a third-party cloud hosting service.
In this tutorial, we will install and configure an ownCloud instance on a CentOS 7 server.
Prerequisites
In order to complete the steps in this guide, you will need the following:
- A sudo user on your server: You can create a user with sudo privileges by following the CentOS 7 initial server setup guide.
- A LAMP stack: ownCloud requires a web server, a database, and PHP to function properly. Setting up a LAMP stack (Linux, Apache, MySQL, and PHP) server fulfills all of these requirements. Follow this guide to install and configure this software.
- To take full advantage of all the features that ownCloud has to offer, make sure to install the following PHP modules:
php-gd, php-intl, php-mbstring, php-process, and php-xml.
- An SSL certificate: How you set this up depends on whether or not you have a domain name that resolves to your server.
- If you have a domain name… the easiest way to secure your site is with Let’s Encrypt, which provides free, trusted certificates. Follow the Let’s Encrypt guide for Apache to set this up.
- If you do not have a domain… and you are just using this configuration for testing or personal use, you can use a self-signed certificate instead. This provides the same type of encryption, but without the domain validation. Follow the self-signed SSL guide for Apache to get set up.
Step 1 – Installing ownCloud
The ownCloud server package does not exist within the default repositories for CentOS. However, ownCloud maintains a dedicated repository for the distro.
To begin, import their release key with the rpm command. The key authorizes the package manager yumto trust the repository.
- sudo rpm –import https://download.owncloud.org/download/repositories/stable/CentOS_7/repodata/repomd.xml.key
Next, use the curl command to download the ownCloud repository file:
- sudo curl -L https://download.owncloud.org/download/repositories/stable/CentOS_7/ce:stable.repo -o /etc/yum.repos.d/ownCloud.repo
After adding the new file, use the clean command to make yum aware of the change:
- sudo yum clean expire-cache
Output
Loaded plugins: fastestmirror
Cleaning repos: base ce_stable extras updates
6 metadata files removed
Finally, perform the installation of ownCloud using the yum utility and the install command:
- sudo yum install owncloud
When prompted with Is this ok [y/d/N]: message, type Y and press the ENTER key to authorize the installation.
Output
. . .
Installed:
  owncloud.noarch 0:9.1.1-1.2

Dependency Installed:
  libX11.x86_64 0:1.6.3-2.el7              libX11-common.noarch 0:1.6.3-2.el7      libXau.x86_64 0:1.0.8-2.1.el7
  libXpm.x86_64 0:3.5.11-3.el7             libpng.x86_64 2:1.5.13-7.el7_2          libxcb.x86_64 0:1.11-4.el7
  libxslt.x86_64 0:1.1.28-5.el7            owncloud-deps-php5.noarch 0:9.1.1-1.2   owncloud-files.noarch 0:9.1.1-1.2
  php-gd.x86_64 0:5.4.16-36.3.el7_2        php-ldap.x86_64 0:5.4.16-36.3.el7_2     php-mbstring.x86_64 0:5.4.16-36.3.el7_2
  php-process.x86_64 0:5.4.16-36.3.el7_2   php-xml.x86_64 0:5.4.16-36.3.el7_2      t1lib.x86_64 0:5.1.2-14.el7

Complete!
With the ownCloud server installed, we will move on to setting up a database for it to use.
Step 2 – Creating a MySQL Database
To get started, log into MySQL with the administrative account:
Enter the password you set for the MySQL root user when you installed the database server.
ownCloud requires a separate database for storing administrative data. While you can call this database whatever you prefer, we decided on the name owncloud to keep things simple.
- CREATE DATABASE owncloud;
Note: Every MySQL statement must end with a semi-colon (;). Be sure to check that this is present if you are experiencing an issue.
Next, create a separate MySQL user account that will interact with the newly created database. Creating one-function databases and accounts is a good idea from a management and security standpoint. As with the naming of the database, choose a username that you prefer. We elected to go with the name owncloud in this guide.
- GRANT ALL ON owncloud.* to ‘owncloud’@’localhost’ IDENTIFIED BY ‘set_database_password‘;
Warning: Be sure to put an actual password where the command states: set_database_password
With the user assigned access to the database, perform the flush-privileges operation to ensure that the running instance of MySQL knows about the recent privilege assignment:
This concludes the configuration of MySQL, therefore we will quit the session by typing:
With the ownCloud server installed and the database set up, we are ready to turn our attention to configuring the ownCloud application.
Step 3 – Configuring ownCloud
To access the ownCloud web interface, open a web browser and navigate to the following address:
https://server_domain_or_IP/owncloud
If a self-signed certificate is being used, you will likely be presented with a warning because the certificate is not signed by one of your browser’s trusted authorities. This is expected and normal. We are only interested in the encryption aspect of the certificate, not the third-party validation of our host’s authenticity. Click the appropriate button or link to proceed to the ownCloud setup page.
You should see something like this:
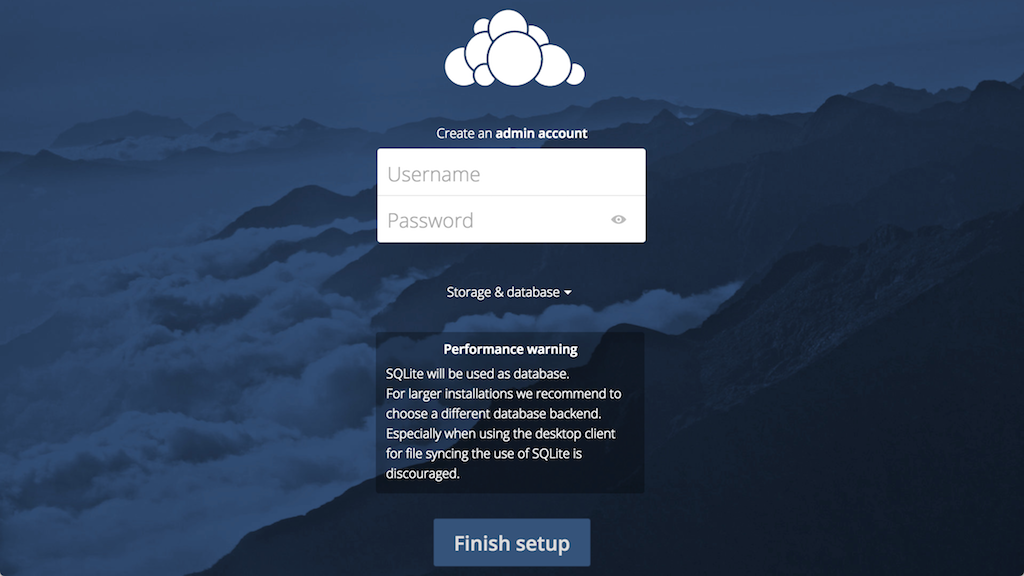
Create an admin account by choosing a username and a password. For security purposes it is not recommended to use something like “admin” for the username.
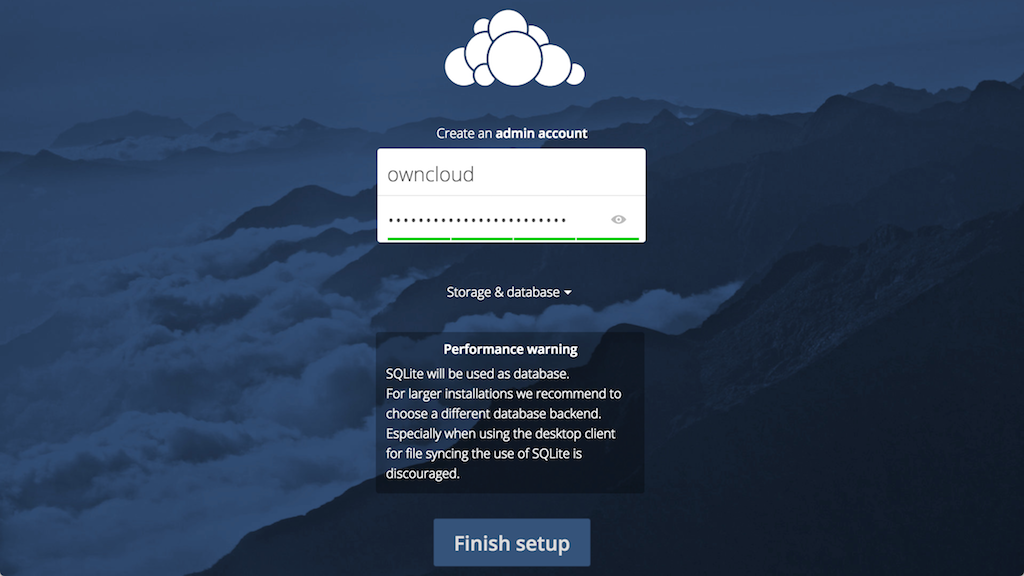
Before clicking the Finish setup button, click on the Storage & database link:
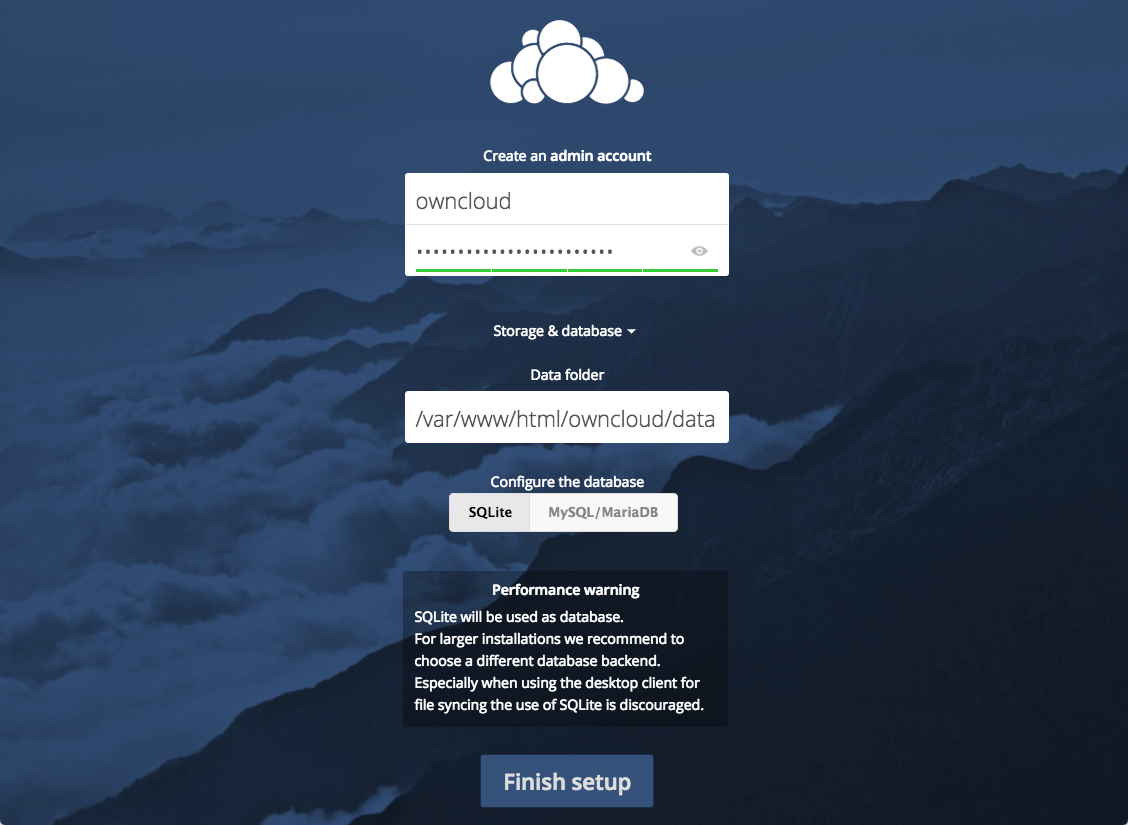
Leave the Data folder setting as-is and click the MySQL/MariaDB button in the Configure the database section.
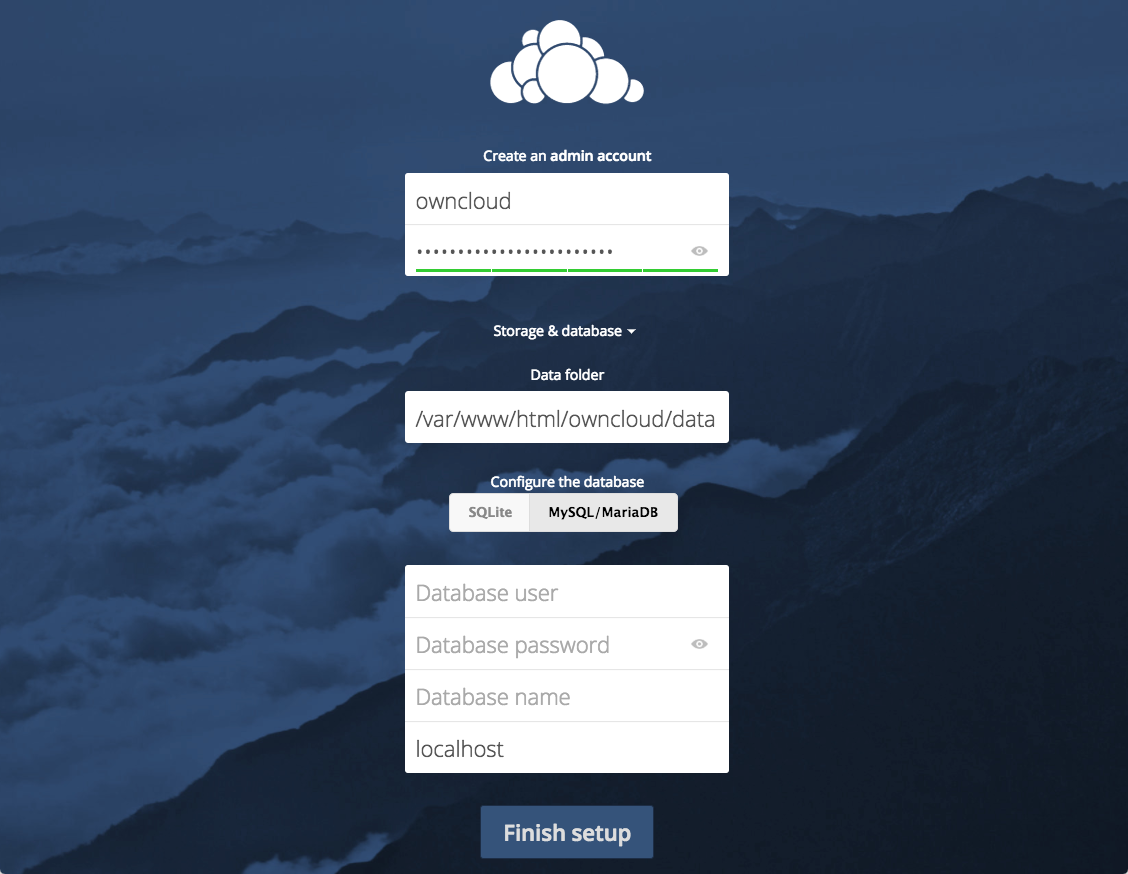
Enter the database information that you configured in the previous step. Below is an example, which matches the database credentials that we used in this guide:
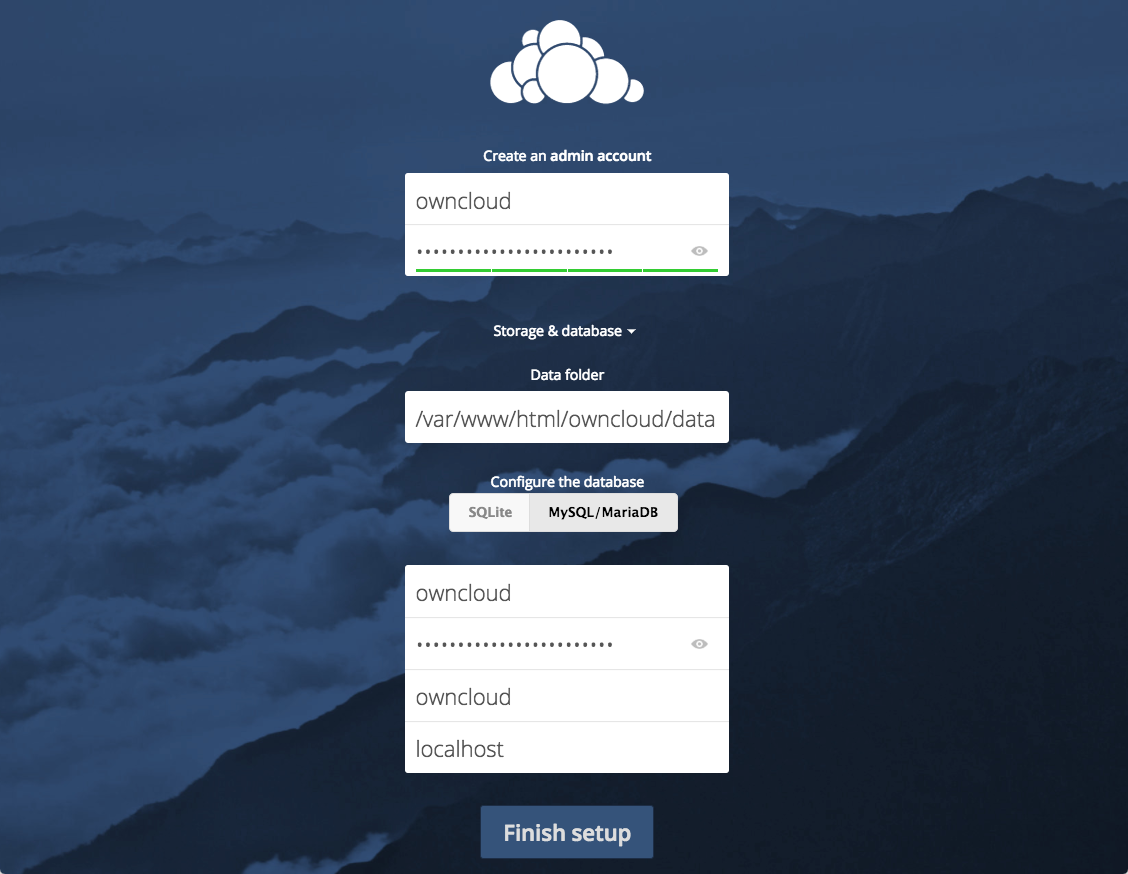
Click the Finish setup button to sign into ownCloud. A safe home for all your data splash screen should appear:
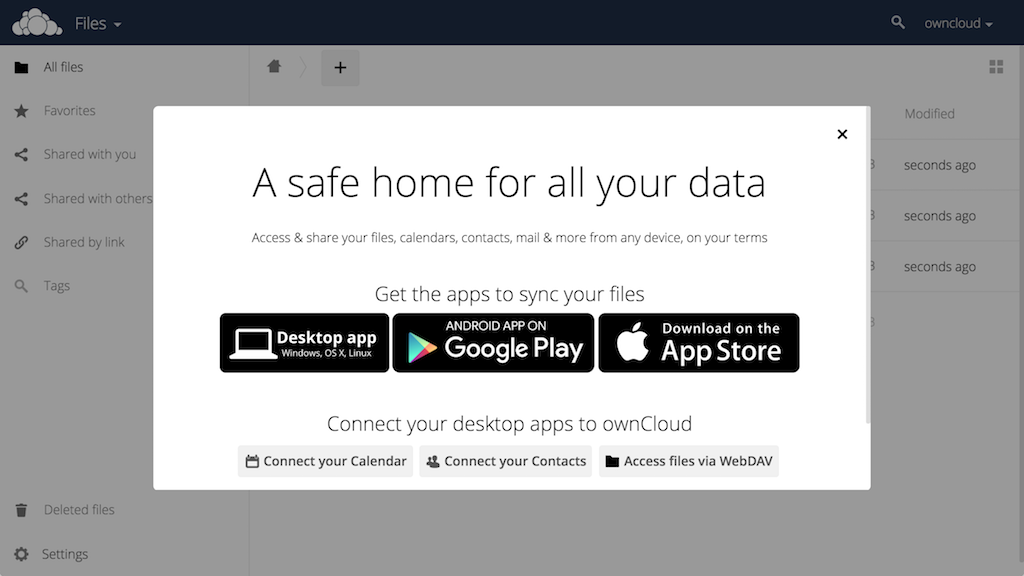
Click the x in the top-right corner of the splash screen to access the main interface:
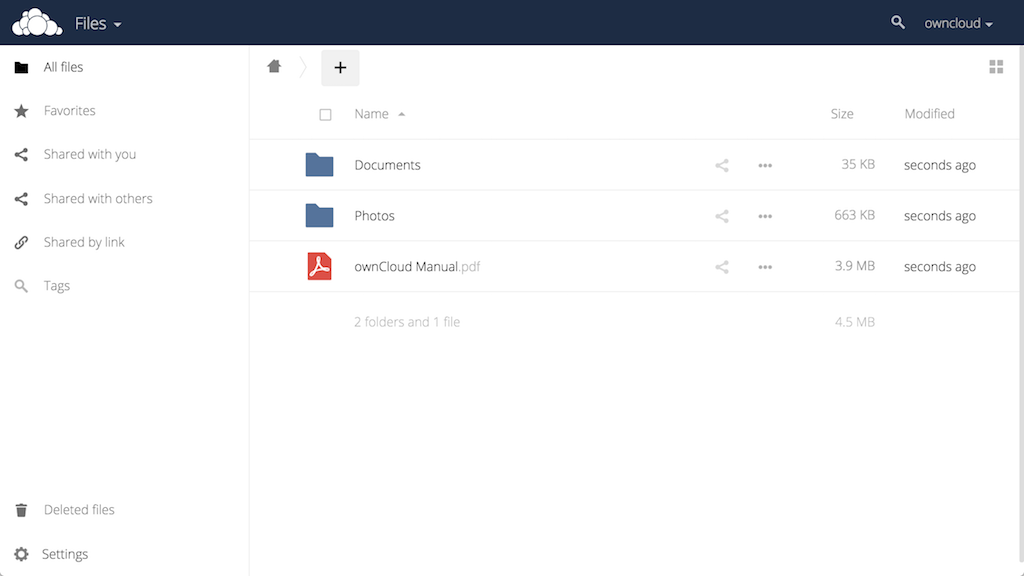
Here, you can create or upload files to your personal cloud.


