phpMyAdmin is an open-source, web-based administration tool for managing the MySQL and MariaDB database. It is written in PHP and is one of the most popular database administration tools used by web hosting companies to enable novice system administrators to carry out database activities.
phpMyAdmin helps in performing database activities such as creating, deleting, querying, tables, columns, relations, indexes, users, permissions, etc. It is released under GNU GPL v2.
In this post, we will see how to install phpMyAdmin with Apache on Debian 10.
Prerequisites
Install MySQL / MariaDB Server
Before installing phpMyAdmin, install a database instance on your system to connect. You could install it as a standalone database or install as part of the LAMP stack.
Install the database and then required packages shown below.
Standalone Database
READ: How To Install MariaDB on Debian 10
sudo apt install -y apache2 apache2-utils php libapache2-mod-php php-pdo php-zip php-json php-common php-fpm php-mbstring php-cli php-mysql
LAMP Stack
READ: How To Install LAMP Stack on Debian 10
sudo apt install -y php-json php-mbstring
Install phpMyAdmin
phpMyAdmin package is not yet available in Debian repository for Debian 10. So, we need to download the tar package from the official website.
wget https://files.phpmyadmin.net/phpMyAdmin/4.9.0.1/phpMyAdmin-4.9.0.1-all-languages.tar.gz
Extract the phpMyAdmin tarball using the following command.
tar -zxvf phpMyAdmin-4.9.0.1-all-languages.tar.gz
Move the phpMyAdmin set up to the desired location.
sudo mv phpMyAdmin-4.9.0.1-all-languages /usr/share/phpMyAdmin
Configure phpMyAdmin
Copy the sample configuration file.
sudo cp -pr /usr/share/phpMyAdmin/config.sample.inc.php /usr/share/phpMyAdmin/config.inc.php
Edit the configuration file and add a blowfish secret.
sudo nano /usr/share/phpMyAdmin/config.inc.php
Generate blowfish secret and then place it into the below line.
$cfg['blowfish_secret'] = '2O:.uw6-8;Oi9R=3W{tO;/QtZ]4OG:T:'; /* YOU MUST FILL IN THIS FOR COOKIE AUTH! */
Also, uncomment the phpMyAdmin storage settings shown like below.
/**
 * phpMyAdmin configuration storage settings.
 */

/* User used to manipulate with storage */
$cfg['Servers'][$i]['controlhost'] = 'localhost';
// $cfg['Servers'][$i]['controlport'] = '';
$cfg['Servers'][$i]['controluser'] = 'pma';
$cfg['Servers'][$i]['controlpass'] = 'pmapass';

/* Storage database and tables */
$cfg['Servers'][$i]['pmadb'] = 'phpmyadmin';
$cfg['Servers'][$i]['bookmarktable'] = 'pma__bookmark';
$cfg['Servers'][$i]['relation'] = 'pma__relation';
$cfg['Servers'][$i]['table_info'] = 'pma__table_info';
$cfg['Servers'][$i]['table_coords'] = 'pma__table_coords';
$cfg['Servers'][$i]['pdf_pages'] = 'pma__pdf_pages';
$cfg['Servers'][$i]['column_info'] = 'pma__column_info';
$cfg['Servers'][$i]['history'] = 'pma__history';
$cfg['Servers'][$i]['table_uiprefs'] = 'pma__table_uiprefs';
$cfg['Servers'][$i]['tracking'] = 'pma__tracking';
$cfg['Servers'][$i]['userconfig'] = 'pma__userconfig';
$cfg['Servers'][$i]['recent'] = 'pma__recent';
$cfg['Servers'][$i]['favorite'] = 'pma__favorite';
$cfg['Servers'][$i]['users'] = 'pma__users';
$cfg['Servers'][$i]['usergroups'] = 'pma__usergroups';
$cfg['Servers'][$i]['navigationhiding'] = 'pma__navigationhiding';
$cfg['Servers'][$i]['savedsearches'] = 'pma__savedsearches';
$cfg['Servers'][$i]['central_columns'] = 'pma__central_columns';
$cfg['Servers'][$i]['designer_settings'] = 'pma__designer_settings';
$cfg['Servers'][$i]['export_templates'] = 'pma__export_templates';
Credit: TECHIES WORLD
Import the create_tables.sql to create tables for phpMyAdmin.
sudo mysql < /usr/share/phpMyAdmin/sql/create_tables.sql -u root -p
Login to MariaDB.
sudo mysql -u root -p
Add the user and grant permission to phpMyAdmin’s database.
GRANT ALL PRIVILEGES ON phpmyadmin.* TO 'pma'@'localhost' IDENTIFIED BY 'pmapass';

FLUSH PRIVILEGES;
Create an alias in Apache web server to access phpMyAdmin with http://your-ip-add-dress/phpmyadmin.
sudo nano /etc/apache2/sites-available/phpmyadmin.conf
Copy and paste the below content into the above file.
Alias /phpMyAdmin /usr/share/phpMyAdmin
Alias /phpmyadmin /usr/share/phpMyAdmin

<Directory /usr/share/phpMyAdmin/>
   AddDefaultCharset UTF-8

   <IfModule mod_authz_core.c>
     # Apache 2.4
     <RequireAny>
      Require all granted
     </RequireAny>
   </IfModule>
   <IfModule !mod_authz_core.c>
     # Apache 2.2
     Order Deny,Allow
     Deny from All
     Allow from 127.0.0.1
     Allow from ::1
   </IfModule>
</Directory>

<Directory /usr/share/phpMyAdmin/setup/>
   <IfModule mod_authz_core.c>
     # Apache 2.4
     <RequireAny>
       Require all granted
     </RequireAny>
   </IfModule>
   <IfModule !mod_authz_core.c>
     # Apache 2.2
     Order Deny,Allow
     Deny from All
     Allow from 127.0.0.1
     Allow from ::1
   </IfModule>
</Directory>
Enable the virtual host with the below command.
sudo a2ensite phpmyadmin
Create the tmp directory for phpMyAdmin and change the permission.
sudo mkdir /usr/share/phpMyAdmin/tmp

sudo chmod 777 /usr/share/phpMyAdmin/tmp
Set the ownership of phpMyAdmin directory.
sudo chown -R www-data:www-data /usr/share/phpMyAdmin
Restart the Apache web service.
sudo systemctl restart apache2
Create DB & User
By default, MariaDB root user is allowed to log in locally via Unix socket. So, we will now create a database user and login to phpMyAdmin with that user.
CREATE DATABASE app_db;

GRANT ALL PRIVILEGES ON app_db.* TO 'app_user'@'localhost' IDENTIFIED BY 'password';

FLUSH PRIVILEGES;

EXIT;
If required, you can disable Unix socket authentication and enable native password login.
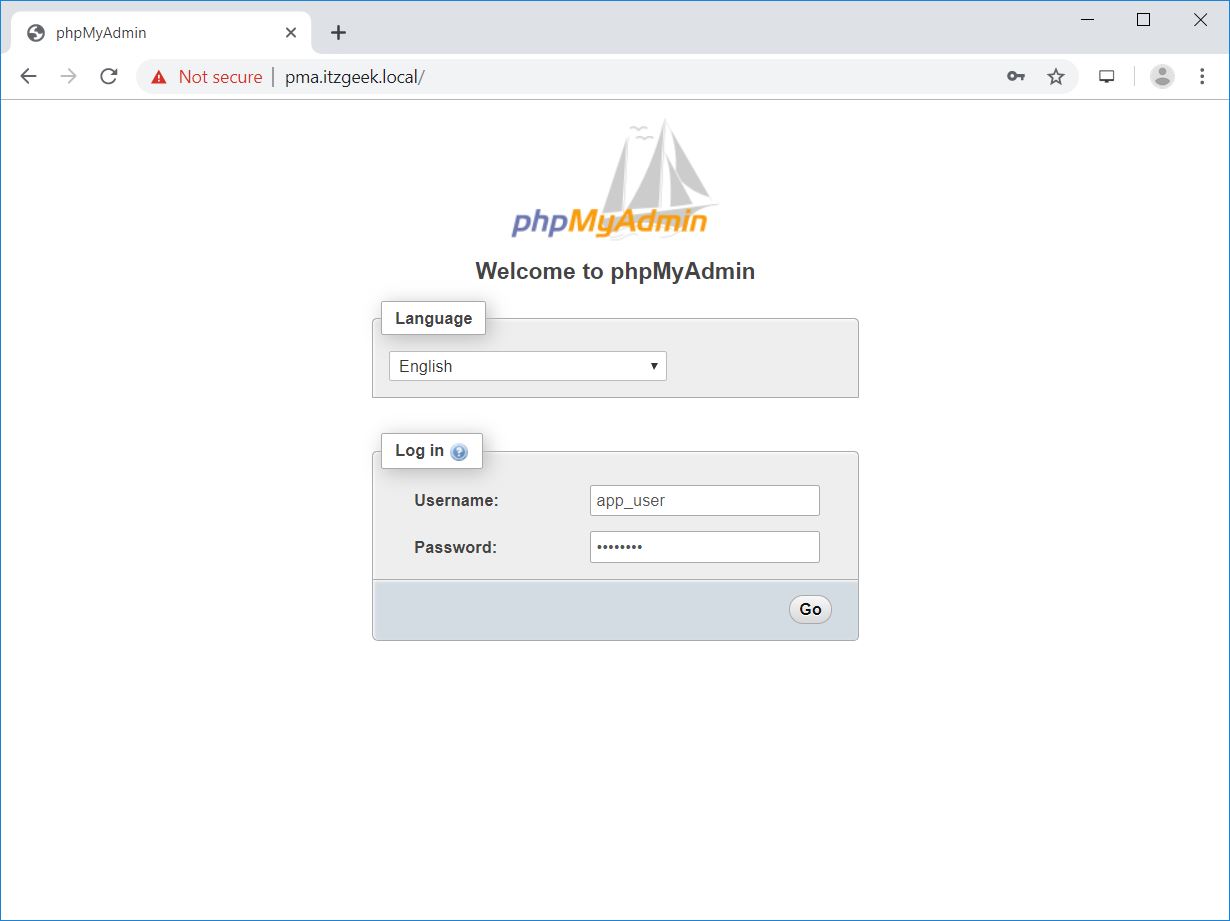
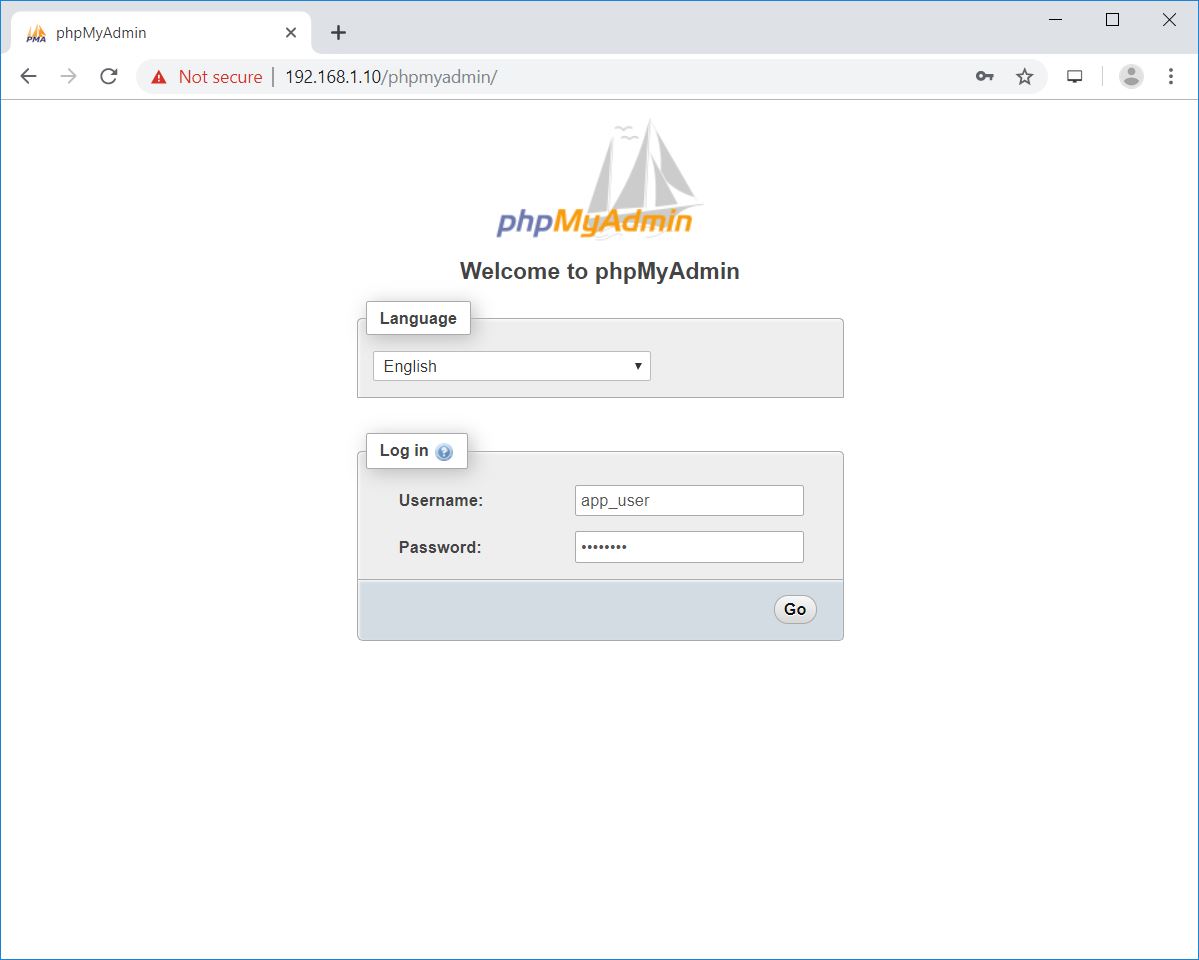
Access phpMyAdmin
Now, access the phpMyAdmin interface using the browser. The URL will be:http://localhost/phpMyAdmin
ORhttp://your-ip-addr-ess/phpMyAdmin
Log in with the database user we created in the previous step.
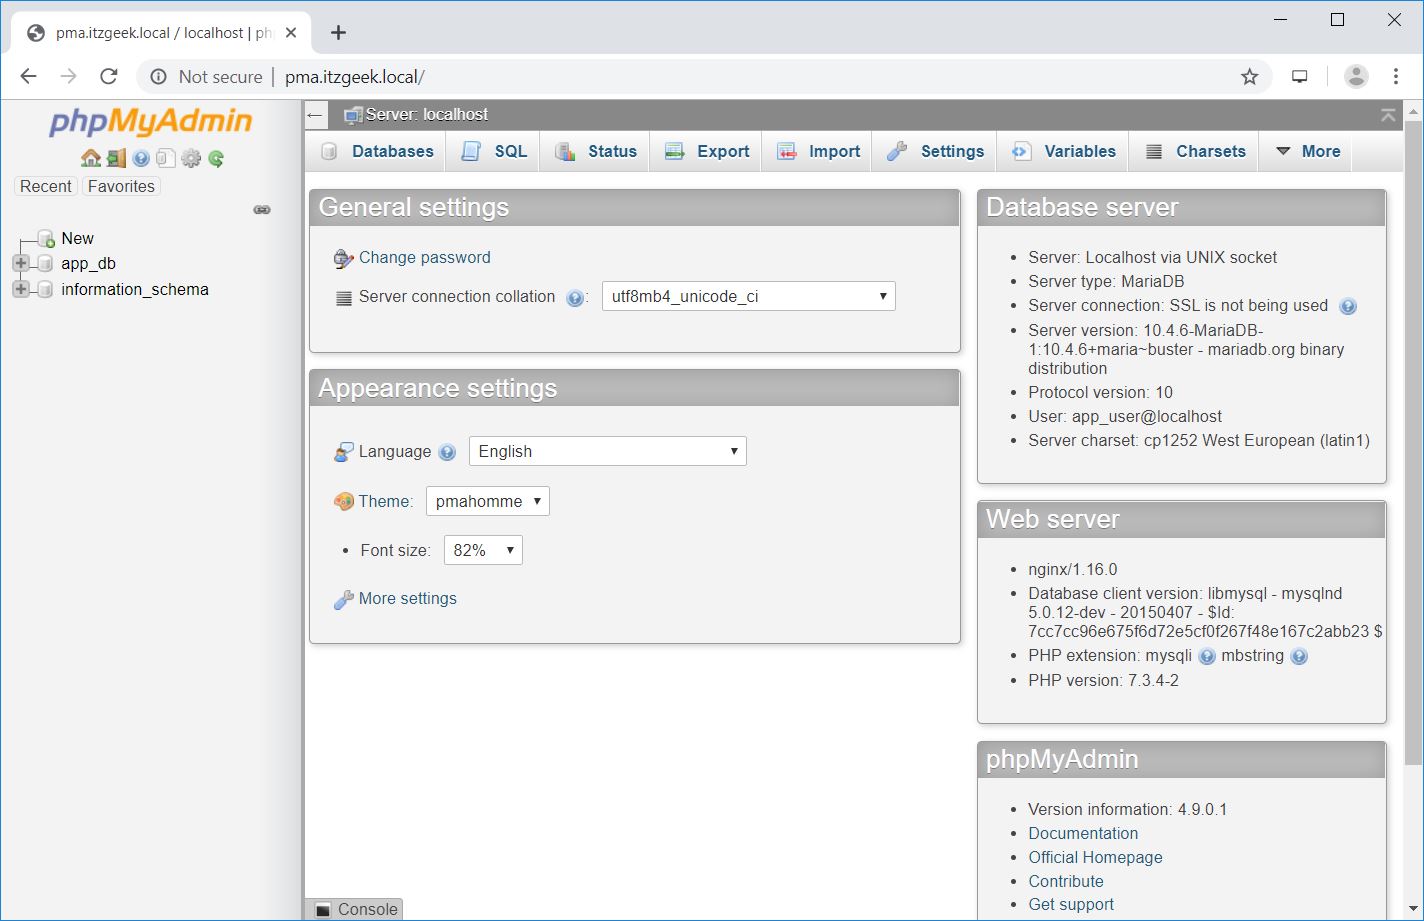
You will get the below page where you can perform all database activities.