VScode > File > Preferences > Settings
Select “downloadWhenOpenInRemoteExplorer” then restart vscode.
Files are read-only when opening from sftp remote explorer.
How To Install phpMyAdmin With Apache on Debian 10
phpMyAdmin is an open-source, web-based administration tool for managing the MySQL and MariaDB database. It is written in PHP and is one of the most popular database administration tools used by web hosting companies to enable novice system administrators to carry out database activities.
phpMyAdmin helps in performing database activities such as creating, deleting, querying, tables, columns, relations, indexes, users, permissions, etc. It is released under GNU GPL v2.
In this post, we will see how to install phpMyAdmin with Apache on Debian 10.
Prerequisites
Install MySQL / MariaDB Server
Before installing phpMyAdmin, install a database instance on your system to connect. You could install it as a standalone database or install as part of the LAMP stack.
Install the database and then required packages shown below.
Standalone Database
READ: How To Install MariaDB on Debian 10
sudo apt install -y apache2 apache2-utils php libapache2-mod-php php-pdo php-zip php-json php-common php-fpm php-mbstring php-cli php-mysql
LAMP Stack
READ: How To Install LAMP Stack on Debian 10
sudo apt install -y php-json php-mbstring
Install phpMyAdmin
phpMyAdmin package is not yet available in Debian repository for Debian 10. So, we need to download the tar package from the official website.
wget https://files.phpmyadmin.net/phpMyAdmin/4.9.0.1/phpMyAdmin-4.9.0.1-all-languages.tar.gz
Extract the phpMyAdmin tarball using the following command.
tar -zxvf phpMyAdmin-4.9.0.1-all-languages.tar.gz
Move the phpMyAdmin set up to the desired location.
sudo mv phpMyAdmin-4.9.0.1-all-languages /usr/share/phpMyAdmin
Configure phpMyAdmin
Copy the sample configuration file.
sudo cp -pr /usr/share/phpMyAdmin/config.sample.inc.php /usr/share/phpMyAdmin/config.inc.php
Edit the configuration file and add a blowfish secret.
sudo nano /usr/share/phpMyAdmin/config.inc.php
Generate blowfish secret and then place it into the below line.
$cfg['blowfish_secret'] = '2O:.uw6-8;Oi9R=3W{tO;/QtZ]4OG:T:'; /* YOU MUST FILL IN THIS FOR COOKIE AUTH! */
Also, uncomment the phpMyAdmin storage settings shown like below.
/**
 * phpMyAdmin configuration storage settings.
 */

/* User used to manipulate with storage */
$cfg['Servers'][$i]['controlhost'] = 'localhost';
// $cfg['Servers'][$i]['controlport'] = '';
$cfg['Servers'][$i]['controluser'] = 'pma';
$cfg['Servers'][$i]['controlpass'] = 'pmapass';

/* Storage database and tables */
$cfg['Servers'][$i]['pmadb'] = 'phpmyadmin';
$cfg['Servers'][$i]['bookmarktable'] = 'pma__bookmark';
$cfg['Servers'][$i]['relation'] = 'pma__relation';
$cfg['Servers'][$i]['table_info'] = 'pma__table_info';
$cfg['Servers'][$i]['table_coords'] = 'pma__table_coords';
$cfg['Servers'][$i]['pdf_pages'] = 'pma__pdf_pages';
$cfg['Servers'][$i]['column_info'] = 'pma__column_info';
$cfg['Servers'][$i]['history'] = 'pma__history';
$cfg['Servers'][$i]['table_uiprefs'] = 'pma__table_uiprefs';
$cfg['Servers'][$i]['tracking'] = 'pma__tracking';
$cfg['Servers'][$i]['userconfig'] = 'pma__userconfig';
$cfg['Servers'][$i]['recent'] = 'pma__recent';
$cfg['Servers'][$i]['favorite'] = 'pma__favorite';
$cfg['Servers'][$i]['users'] = 'pma__users';
$cfg['Servers'][$i]['usergroups'] = 'pma__usergroups';
$cfg['Servers'][$i]['navigationhiding'] = 'pma__navigationhiding';
$cfg['Servers'][$i]['savedsearches'] = 'pma__savedsearches';
$cfg['Servers'][$i]['central_columns'] = 'pma__central_columns';
$cfg['Servers'][$i]['designer_settings'] = 'pma__designer_settings';
$cfg['Servers'][$i]['export_templates'] = 'pma__export_templates';
Credit: TECHIES WORLD
Import the create_tables.sql to create tables for phpMyAdmin.
sudo mysql < /usr/share/phpMyAdmin/sql/create_tables.sql -u root -p
Login to MariaDB.
sudo mysql -u root -p
Add the user and grant permission to phpMyAdmin’s database.
GRANT ALL PRIVILEGES ON phpmyadmin.* TO 'pma'@'localhost' IDENTIFIED BY 'pmapass';

FLUSH PRIVILEGES;
Create an alias in Apache web server to access phpMyAdmin with http://your-ip-add-dress/phpmyadmin.
sudo nano /etc/apache2/sites-available/phpmyadmin.conf
Copy and paste the below content into the above file.
Alias /phpMyAdmin /usr/share/phpMyAdmin
Alias /phpmyadmin /usr/share/phpMyAdmin

<Directory /usr/share/phpMyAdmin/>
   AddDefaultCharset UTF-8

   <IfModule mod_authz_core.c>
     # Apache 2.4
     <RequireAny>
      Require all granted
     </RequireAny>
   </IfModule>
   <IfModule !mod_authz_core.c>
     # Apache 2.2
     Order Deny,Allow
     Deny from All
     Allow from 127.0.0.1
     Allow from ::1
   </IfModule>
</Directory>

<Directory /usr/share/phpMyAdmin/setup/>
   <IfModule mod_authz_core.c>
     # Apache 2.4
     <RequireAny>
       Require all granted
     </RequireAny>
   </IfModule>
   <IfModule !mod_authz_core.c>
     # Apache 2.2
     Order Deny,Allow
     Deny from All
     Allow from 127.0.0.1
     Allow from ::1
   </IfModule>
</Directory>
Enable the virtual host with the below command.
sudo a2ensite phpmyadmin
Create the tmp directory for phpMyAdmin and change the permission.
sudo mkdir /usr/share/phpMyAdmin/tmp

sudo chmod 777 /usr/share/phpMyAdmin/tmp
Set the ownership of phpMyAdmin directory.
sudo chown -R www-data:www-data /usr/share/phpMyAdmin
Restart the Apache web service.
sudo systemctl restart apache2
Create DB & User
By default, MariaDB root user is allowed to log in locally via Unix socket. So, we will now create a database user and login to phpMyAdmin with that user.
CREATE DATABASE app_db;

GRANT ALL PRIVILEGES ON app_db.* TO 'app_user'@'localhost' IDENTIFIED BY 'password';

FLUSH PRIVILEGES;

EXIT;
If required, you can disable Unix socket authentication and enable native password login.
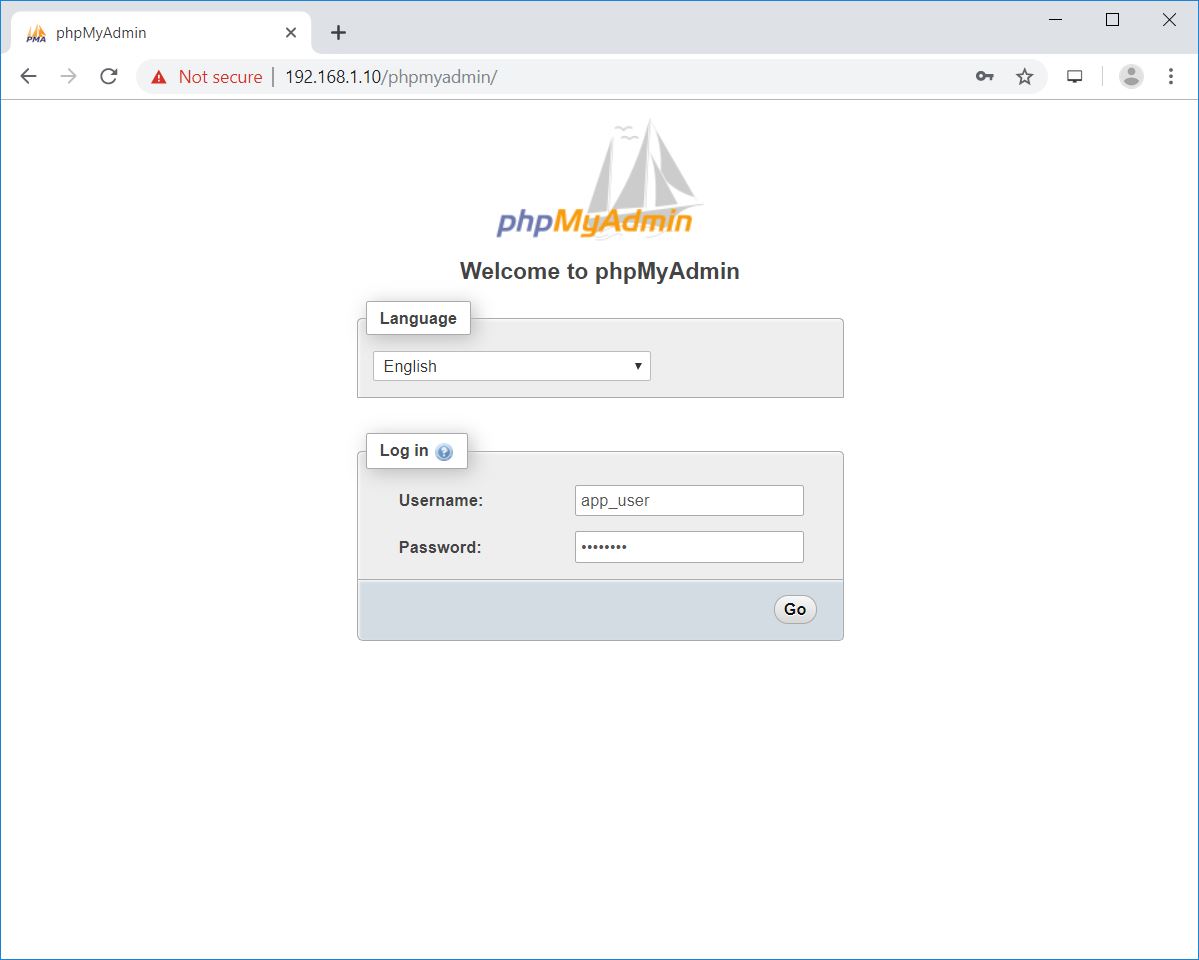
Access phpMyAdmin
Now, access the phpMyAdmin interface using the browser. The URL will be:http://localhost/phpMyAdmin
ORhttp://your-ip-addr-ess/phpMyAdmin
Log in with the database user we created in the previous step.
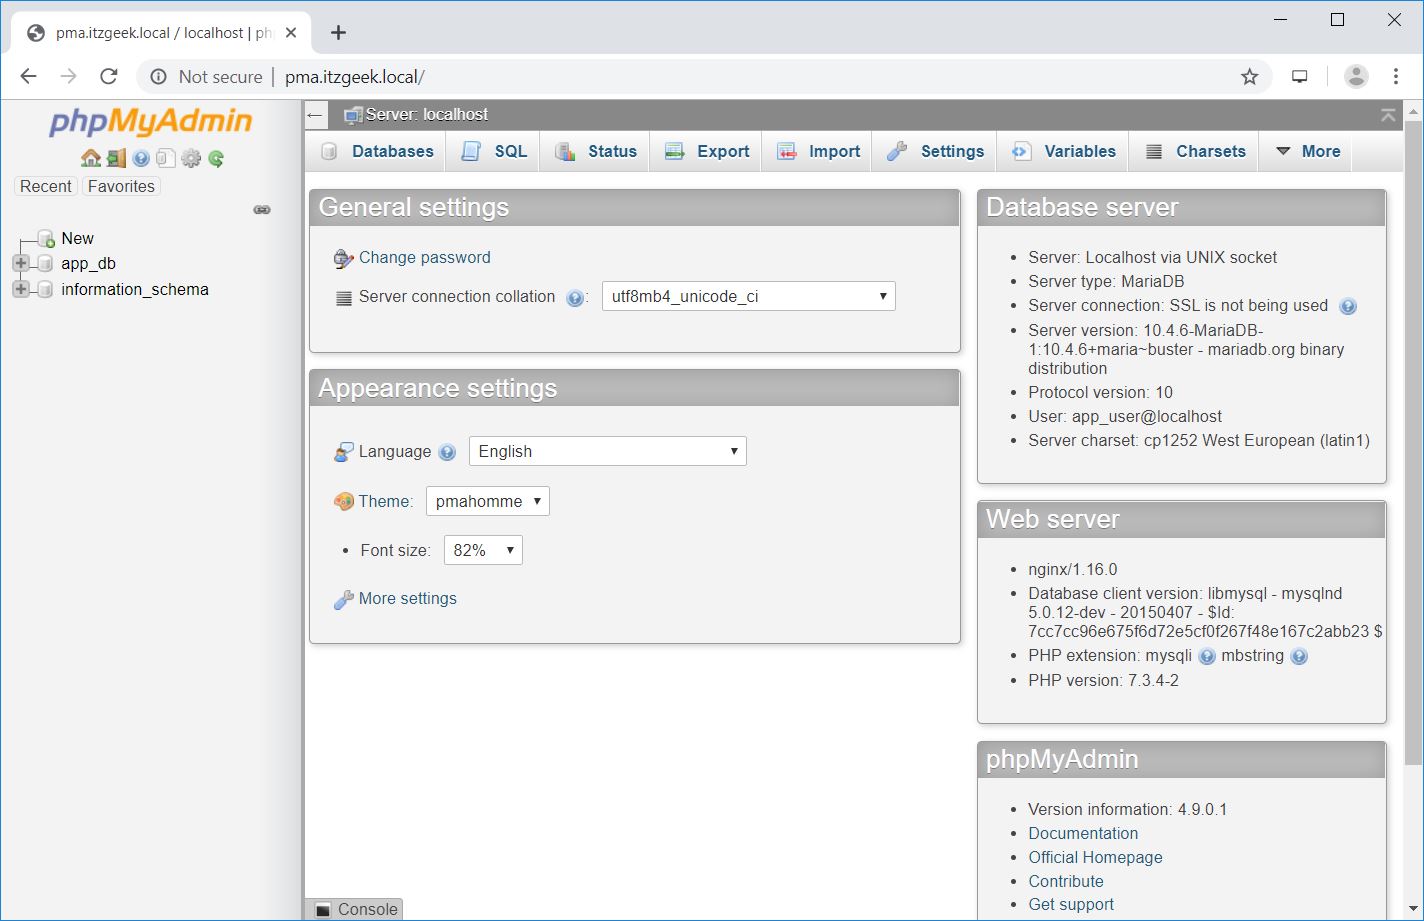
You will get the below page where you can perform all database activities.
How To Install phpMyAdmin with Nginx on Debian 10
phpMyAdmin is a free and open-source, web-based tool for managing the MySQL and MariaDB servers. It is widely used to manage the database by web hosting companies and administrators who are new to the database.
phpMyAdmin helps the system administrator to perform databases activities such as creating, deleting, querying, database, tables, columns, etc.
In this post, we will see how to install phpMyAdmin with Nginx on Debian 10.
Prerequisites
Install MariaDB Server
To install phpMyAdmin, your system must have a database instance running and Nginx web server.
Standalone Database
Follow the below tutorials and prepare your system for setting up phpMyAdmin.
Step 1: How To Install MariaDB on Debian 10
Then,
Step 2: How To Install LEMP Stack on Debian 10You can skip the database part in Step 2 – LEMP stack tutorial if you have followed the Step 1 – MariaDB installation.
Install PHP extensions for phpMyAdmin to connect with database.
sudo apt install -y php-json php-mbstring
LEMP Stack
READ: How To Install LEMP Stack on Debian 10
Install PHP extensions for phpMyAdmin to connect with database.
sudo apt install -y php-json php-mbstring
Install phpMyAdmin
The phpMyAdmin is not available as Deb package in Debian OS repository for Debian 10. So, we will download the tarball from the official website.
wget https://files.phpmyadmin.net/phpMyAdmin/4.9.0.1/phpMyAdmin-4.9.0.1-all-languages.tar.gz
Extract phpMyAdmin using the tar command.
tar -zxvf phpMyAdmin-4.9.0.1-all-languages.tar.gz
Move the phpMyAdmin to your desired location.
sudo mv phpMyAdmin-4.9.0.1-all-languages /usr/share/phpMyAdmin
Configure phpMyAdmin
Copy the sample configuration file.
sudo cp -pr /usr/share/phpMyAdmin/config.sample.inc.php /usr/share/phpMyAdmin/config.inc.php
Edit the configuration file.
sudo nano /usr/share/phpMyAdmin/config.inc.php
Generate a blowfish secret and update the secret in the configuration file.
$cfg['blowfish_secret'] = 'CfX1la/aG83gx1{7rADus,iqz8RzeV8x'; /* YOU MUST FILL IN THIS FOR COOKIE AUTH! */
Also, uncomment the phpMyAdmin storage settings.
/**
 * phpMyAdmin configuration storage settings.
 */

/* User used to manipulate with storage */
$cfg['Servers'][$i]['controlhost'] = 'localhost';
// $cfg['Servers'][$i]['controlport'] = '';
$cfg['Servers'][$i]['controluser'] = 'pma';
$cfg['Servers'][$i]['controlpass'] = 'pmapass';

/* Storage database and tables */
$cfg['Servers'][$i]['pmadb'] = 'phpmyadmin';
$cfg['Servers'][$i]['bookmarktable'] = 'pma__bookmark';
$cfg['Servers'][$i]['relation'] = 'pma__relation';
$cfg['Servers'][$i]['table_info'] = 'pma__table_info';
$cfg['Servers'][$i]['table_coords'] = 'pma__table_coords';
$cfg['Servers'][$i]['pdf_pages'] = 'pma__pdf_pages';
$cfg['Servers'][$i]['column_info'] = 'pma__column_info';
$cfg['Servers'][$i]['history'] = 'pma__history';
$cfg['Servers'][$i]['table_uiprefs'] = 'pma__table_uiprefs';
$cfg['Servers'][$i]['tracking'] = 'pma__tracking';
$cfg['Servers'][$i]['userconfig'] = 'pma__userconfig';
$cfg['Servers'][$i]['recent'] = 'pma__recent';
$cfg['Servers'][$i]['favorite'] = 'pma__favorite';
$cfg['Servers'][$i]['users'] = 'pma__users';
$cfg['Servers'][$i]['usergroups'] = 'pma__usergroups';
$cfg['Servers'][$i]['navigationhiding'] = 'pma__navigationhiding';
$cfg['Servers'][$i]['savedsearches'] = 'pma__savedsearches';
$cfg['Servers'][$i]['central_columns'] = 'pma__central_columns';
$cfg['Servers'][$i]['designer_settings'] = 'pma__designer_settings';
$cfg['Servers'][$i]['export_templates'] = 'pma__export_templates';
Credit: TECHIES WORLD
Import the create_tables.sql to create tables for phpMyAdmin.
sudo mysql < /usr/share/phpMyAdmin/sql/create_tables.sql -u root -p
Login to MariaDB.
sudo mysql -u root -p
Add the user and grant permission to phpMyAdmin’s database.
GRANT ALL PRIVILEGES ON phpmyadmin.* TO 'pma'@'localhost' IDENTIFIED BY 'pmapass';

FLUSH PRIVILEGES;
Create a virtual host configuration file for phpMyAdmin (Ex. phpMyAdmin.conf) under the /etc/nginx/conf.ddirectory.
sudo nano /etc/nginx/conf.d/phpMyAdmin.conf
Use the following information to create a virtual host for phpMyAdmin. Change the domain name (server_name) as per your requirement.
server {
   listen 80;
   server_name pma.itzgeek.local;
   root /usr/share/phpMyAdmin;

   location / {
      index index.php;
   }

## Images and static content is treated different
   location ~* ^.+.(jpg|jpeg|gif|css|png|js|ico|xml)$ {
      access_log off;
      expires 30d;
   }

   location ~ /\.ht {
      deny all;
   }

   location ~ /(libraries|setup/frames|setup/libs) {
      deny all;
      return 404;
   }

   location ~ \.php$ {
      include /etc/nginx/fastcgi_params;
      fastcgi_pass 127.0.0.1:9000;
      fastcgi_index index.php;
      fastcgi_param SCRIPT_FILENAME /usr/share/phpMyAdmin$fastcgi_script_name;
   }
}
Create a tmp directory for phpMyAdmin and then change the permission.
sudo mkdir /usr/share/phpMyAdmin/tmp

sudo chmod 777 /usr/share/phpMyAdmin/tmp
Set the ownership of phpMyAdmin directory.
sudo chown -R www-data:www-data /usr/share/phpMyAdmin
Restart the services.
sudo systemctl restart nginx

sudo systemctl restart php7.3-fpm
Create DB & User
By default, MariaDB root user is allowed to log in locally via Unix socket. So, we will now create a database user and login to phpMyAdmin with that user.
CREATE DATABASE app_db;

GRANT ALL PRIVILEGES ON app_db.* TO 'app_user'@'localhost' IDENTIFIED BY 'password';

FLUSH PRIVILEGES;

EXIT;
If required, you can disable Unix socket authentication and enable native password login.
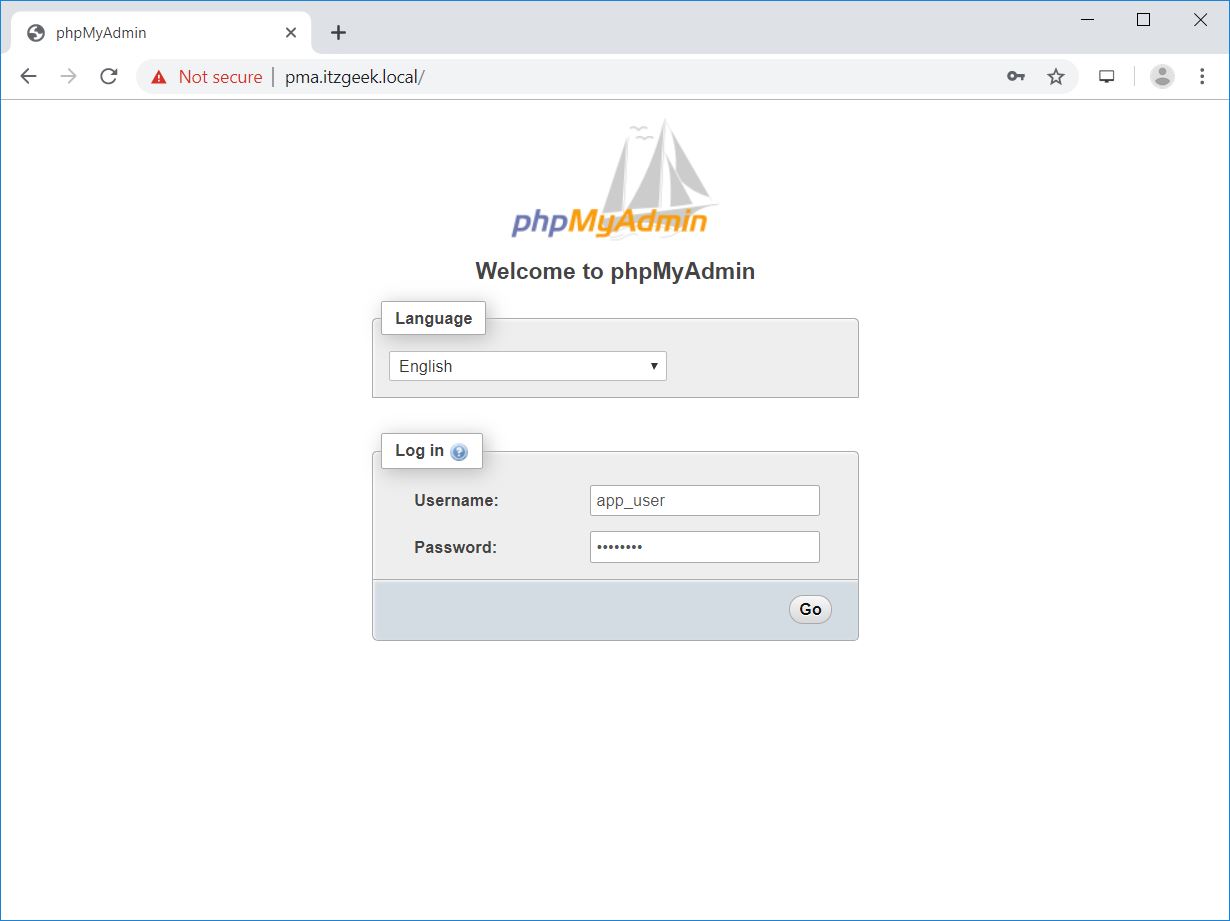
Access phpMyAdmin
Access the phpMyAdmin using the browser by going to the below URL.http://your-fully-qualified-domain-name
Log in with database user we just created in the previous step.
You will get the home page where you can manage databases.

Repair loop pfsense console
entre em mode single.
quando você cair em prompt digite.
/sbin/fsck -y -t ufs
quando finalizar e só bootar o servidor e pronto.
boa sorte.
Unofficial WPAD package for pfSense software
Here are install instructions for UNOFFICIAL wpad package for pfSense(R) software 2.3.x
It’s based on forum tutorials to configure a second nginx instance to host pac file(s) in http and leave gui on https.
Under console/ssh, fetch the install script, check what it does if you want and then execute it.
Install
You can enable Unoffical repo creating or downloading the file below:
2.3 AMD64
fetch -q -o /usr/local/etc/pkg/repos/Unofficial.conf https://raw.githubusercontent.com/marcelloc/Unofficial-pfSense-packages/master/Unofficial.conf
2.3 I386
fetch -q -o /usr/local/etc/pkg/repos/Unofficial.conf https://raw.githubusercontent.com/marcelloc/Unofficial-pfSense-packages/master/Unofficiali386.conf
2.4
fetch -q -o /usr/local/etc/pkg/repos/Unofficial.conf https://raw.githubusercontent.com/marcelloc/Unofficial-pfSense-packages/master/Unofficial.24.conf
After fetching the repo file, you can see these packages under System -> Package Manager
Without enabling Unofficial repo, you can add it using console/ssh with
cd /root
fetch https://raw.githubusercontent.com/marcelloc/Unofficial-pfSense-packages/master/pkg-wpad/files/install_wpad_23.sh
sh ./install_wpad_23.sh
Manual Remove/uninstall
pkg delete pfSense-pkg-Wpad
Once it finishes, all must be in place. If you do not see the menu after it finishes, try to install any pfSense package from GUI, like cron for example.
WARNING
Use it at your own risk.
This script does not install packages from freebsd.
Proxy HTTP/HTTPS + SquidGuard + sgerror.php + WPAD via DHCP e DNS 100%
Esse é pra você que tentou tutorias de diversos locais e sempre parava pela metade, devido a erros ou falta de informações.
Fiz um ambiente 100% funcional e venho compartilhar com vocês.
Cenário:
pfSense 2.3 +
package Squid
package SquidGuard
LAN 192.168.1.1/24
pfsense.localdomain
***** Validado nas versões: 2.3.X ***
*** Validado nas versões 2.4.X em 27/10/2017 ***
*** Não testei em versões anteriores *****
Utilizo (e recomendo) a webGUI em HTTPS, por questões de segurança. Porém, haviam problemas com sgerror.php do squidguard quando utilizado desta maneira (mas vamos contorná-los!). Neste guia, estou utilizando HTTPS – porta 9443.
Preparando o ambiente
System > General Setup
Escolha os servidores DNS de sua preferência, no meu caso, utilizei 8.8.8.8 e 8.8.4.4.
Desmarcar o “Disable DNS Forwarder”, pois vamos utilizar este serviço para fornecer o WPAD via DNS, atingindo qualquer navegador.
System > Advanced > Admin Access
Habilite o acesso SSH
System > Cert. Manager
Adicione um novo CA para utilização no Man-In-The-Middle do Squid posteriormente
Descriptive Name: Escolha um nome para sua CA. Este nome será visível para os clientes.
Method: Selecione “Create an internal Certificate Authority” no menu dropdown.
Key length: É recomendado 2048 para máxima compatibilidade
Digest Algorithm – use SHA256 ou superior.
LifeTime – Configure para 3650 dias (10 anos).
Distinguished Name – Preencha todos os campos como Country, State, etc.
Salve
Services > DNS Resolver
Por padrão, o PF habilita este serviço. Desative, pois vamos configurar através do DNS Forwarder
Services > DNS Forwarder
Habilite o DNS forwarder
Marque DNS Query Forwarding – Query DNS servers sequentially
Interfaces – LAN
Marque Strict binding
Em custom options, adicione as seguintes instruções:
dhcp-option=252,http://192.168.1.1/proxy.pac
dhcp-option=252,http://192.168.1.1/wpad.dat
dhcp-option=252,http://192.168.1.1/wpad.da
Vamos adicionar um host em “Host Overrides”
Add
Host = wpad
Domain = localdomain (altere para o domínio que você tenha configurado)
IP Address = 192.168.1.1
Salve as configurações feitas.
Services > DHCP Server
DNS Server 1 = 192.168.1.1 (A resolução de nomes será controlada pelo próprio pfSense)
Additional BOOTP/DHCP Options – Adicione 3 entradas 252
252 – text – http://192.168.1.1/wpad.dat
252 – text – http://192.168.1.1/wpad.da
252 – text – http://192.168.1.1/proxy.pac
Vamos preparar o NGINX para subir uma 2º instância, para servir o WPAD e o sgerror.php na porta 80.
Anteriormente, eram realizados diversos comandos no SHELL para este propósito, mas foram substituídos por este pacote (WPAD – não oficial), criado pelo Marcelloc, que será instalado no passo a seguir.
Mãos a obra!
Entrar pelo Putty no PFSense e com usuário root, na tela de opções escolher a opção 8.
Habilitar o repositório não oficial (DE ACORDO COM SUA VERSÂO):
2.3.X 32 bits
fetch -q -o /usr/local/etc/pkg/repos/Unofficial.conf https://raw.githubusercontent.com/marcelloc/Unofficial-pfSense-packages/master/Unofficial.conf
2.3.X 64 bits
fetch -q -o /usr/local/etc/pkg/repos/Unofficial.conf https://raw.githubusercontent.com/marcelloc/Unofficial-pfSense-packages/master/Unofficiali386.conf
2.4.X 64 bits
fetch -q -o /usr/local/etc/pkg/repos/Unofficial.conf https://raw.githubusercontent.com/marcelloc/Unofficial-pfSense-packages/master/Unofficial.24.conf
Fazer update dos repositórios:
pkg update -f
Agora irá aparecer o pacote WPAD para download no Gerenciador de Pacotes. Faça a instalação.
Este pacote cria a 2ª instância do NGINX, os arquivos WPAD e os diretórios respectivos.
Na webGUI, acesse o menu SERVICES > WPAD | Adicione a interface (geralmente LAN) e salve.
Feito isto, acesse em um navegador que esteja na rede LAN para confirmar o funcionamento:
Vai baixar os arquivos, ou apresentar o conteúdo na própria página web (dependendo o navegador e as configurações).
Se você chegou até aqui, com tudo funcionando, significa que o ambiente está preparado para receber as configurações do squid e squidguard!
Services > Squid Proxy Server
Lembrando que deve-se configurar o Local Cache para poder ativar as configurações do squid.
Habilite o squid
Marque a opção – Resolve DNS IPv4 First
Transparent HTTP Proxy– Deixe DESMARCADO
HTTPS/SSL Interception – Deixe MARCADO
Porta 3128 (sim, a mesma porta!)
CA – selecione o certificado criado lá no início
SSL Certificate Deamon Children – 25
Remote Cert Checks – Selecione este: Accept remote server certificate with erros
Certificate Adapt – Selecione estes 2: Set “Not After” | Set “Not Before”
E agora o segredo:
Em Show Advanced Options, na caixa Integrations, coloque isto:
ssl_bump none all
Salve as configurações.
Services > SquidGuard Proxy Filter
Habilite o serviço
Marque as 3 opções de LOG
Habilite a blacklist e coloque o link da mais conhecida: http://www.shallalist.de/Downloads/shallalist.tar.gz
Salve
Va na guia Target Categories
Adicione uma nova
Nome – BRADESCO
Regular Expression – bradesco
Marque o log da ACL
Salvar
Porque Bradesco? O site do bradesco fica dando refresh sozinho, alternando entre bradesco.com.br e banco.bradesco.
Com isso resolve o problema, já que somos obrigado a criar uma Target Categorie pro SG ficar 100%, matamos 2 coelhos numa cajadada só!
Blacklist
Faça o download da shallalist e aguarde o processo finalizar.
Common ACL
Clique no botão + ao lado de TargetRules List e deixe a categoria BRADESCO como ALLOW
Defina as outras categorias de acordo com sua necessidade
Redirect mode – ext url err page(enter URL)
Redirect info – http://192.168.1.1/sgerror.php?url=302 &a=%a&n=%n&i=%i&s=%s&t=%t&u=%u
Marque o log e salve
DICA: Para aparecer a categoria corretamente na página de bloqueio, você deve deixar explícito a ação DENY nas ACLs. Se deixar o “traço” para pegar a política padrão, a categoria não será exibida!
Volte para General Settings e de um APPLY
Finalizado o tão sonhado proxy ativo de forma “transparente”.
DICA: Faça bloqueio das portas 80 e 443 na saída da LAN, para forçar que a navegação saia somente pelo proxy!
Note que não será necessário instalar o certificado nas estações;
Não será necessário cadastrar o proxy no navegador (Deixar opção detectar automaticamente marcada);
Funciona para qualquer browser, Chrome, IE, Firefox, Opera, etc…
**Obs1: Caso não tenha funcionado, observe todos os passos atentamente
Obs2: Os tratamentos para liberação e bloqueio de conteúdo serão feitos todos no squidGuard
Obs3: Não funciona para dispositivos mobiles (Android / iOS / WindowsPhone), a não ser que você configure manualmente nos aparelhos,
o que torna inviável. Neste caso, a solução seria isolar a rede wifi com VLAN/Captive Portal**
Chegamos ao fim!
recuperar repositório perdido no pfsense.
apos aplicar um path no servidor pfsense, meu repositório sumiu.
e agora?
para você recuperar a lista de repositório você deve ir ate o diretoria de um servidor que esta funcionado o mesmo e copiar para o servidor com problema.
a lista de repositório fica em.
/usr/local/share/pfSense/pkg/repos
e só copiar o conteúdo para o servidor com problema e tudo esta normalizado.
traduzindo mensagens de êrro – postfix
as mensagens de êrro do postfix podem ser traduzidas para o português, conforme receitinha colocada na lista postfix hoje pelo colega Amado Tairone.
é bem simples, vejam:
=== begin
Acabei de configurar meu servidor para traduziar as mensagens de erro
seguindo a documentação do postfix.
Fica aí uma ajuda para quem ainda não conseguiu fazer:
Passos para traduzir as mensagens de erro no postfix.
1 – digite postconf -b para visualizar as mensagens default que estarão em
ingles.
2- crie um arquivo com nome qualquer no /etc/postfix. Eu criei um chamado
merros.cf
3- dentro do arquivo vc precisa colocar que tipo de mensagem de erro deverá
ser traduzida.
Segundo a documentação existem
*failure_template*, *delay_template*, s*uccess_template** e verify_template*,
Deverá ser feito desta foma:
Ex.: vou pegar o failure_template que são mensagens enviadas ao
rementente quando o destinatário
não existe.
…Dentro do arquivo merros.cf
editar o failure_template
Esta e uma mensagem de $hostname
Me desculpe, mas tenho que lhe informar que sua mensagem nao pode
ser entregue a um ou mais usuarios.
Para obter ajuda, entre em contato com o suporte de sua conta
de email.
Caso o fizer, por favor, inclua esta mensagens ao reportar o
problema.
Servidor de Email.
===
Você pode adicionar as demais.
Salve o arquivo e saia.
4 – edite o arquivo main.cf e adicione
bounce_template_file = /etc/postfix/merros.cf e salve
5 – digite novamente postconf -b para ver se a tradução foi aceita,
caso sua tradução não seja exibida
verifique se existe algum erro no arquivo.
Para testar basta enviar uma mensagem para um destinatário inexistem
do seu proprio dominio e ver se recebe a
mensagem de erro já em protugues.
Google reCAPTCHA V2 tutorial with Example Demo in PHP
Google has announced new service to prevent spams and attacks to your website. They name it “NO CAPTCHA reCAPTCHA” . Google reCAPTCHA is designed to protect your website from spams and abuse.
In this tutorial i am going to show you how to integrate it into your website. For demo purpose i made one simple script. Please look at the demo.LIVE DEMODOWNLOAD
Google has deprecated the reCAPTCHA V1. We have updated the article to meet the changes of Google reCAPTCHA V2.
Table of Contents
Register your website and get Secret Key.
Very first thing you need to do is register your website on Google recaptcha to do that click here.
Login to your Google account and create the app by filling the form. Select the reCAPTCHA v2 and in that select “I am not a robot” checkbox option.

Once submit, Google will provide you following two information.
- Site key
- Secret key

Integrate Google reCAPTCHA in your website.
To integrate it into your website you need to put it in client side as well as in Server side. In client HTML page you need to integrate this line before <HEAD> tag.<script src=’https://www.google.com/recaptcha/api.js’ async defer></script>
And to show the widget into your form you need to put this below contact form, comment form etc.<div class=”g-recaptcha” data-sitekey=”== Your site Key ==”></div>
When the form get submit to Server, this script will send ‘g-recaptcha-response’ as a POST data. You need to verify it in order to see whether user has checked the Captcha or not.
Sample project
Here is the HTML code for the simple form with comment box and submit button. On submit of this form we will use PHP in back-end to do the Google reCAPTCHA validation.Index.html<html>
<head>
<title>Google recapcha demo – Codeforgeek</title>
<script src=’https://www.google.com/recaptcha/api.js’ async defer></script>
</head>
<body>
<h1>Google reCAPTHA Demo</h1>
<form id=”comment_form” action=”form.php” method=”post”>
<input type=”email” placeholder=”Type your email” size=”40″><br><br>
<textarea name=”comment” rows=”8″ cols=”39″></textarea><br><br>
<input type=”submit” name=”submit” value=”Post comment”><br><br>
<div class=”g-recaptcha” data-sitekey=”=== Your site key ===”></div>
</form>
</body>
</html>

This will generate this form.
On server side i am using PHP for now. So on Form submit request we will check the POST variable.form.php<?php
$email;$comment;$captcha;
if(isset($_POST[‘email’])){
$email=$_POST[‘email’];
}
if(isset($_POST[‘comment’])){
$comment=$_POST[‘comment’];
}
if(isset($_POST[‘g-recaptcha-response’])){
$captcha=$_POST[‘g-recaptcha-response’];
}
if(!$captcha){
echo ‘<h2>Please check the the captcha form.</h2>’;
exit;
}
$secretKey = “Put your secret key here”;
$ip = $_SERVER[‘REMOTE_ADDR’];
// post request to server
$url = ‘https://www.google.com/recaptcha/api/siteverify?secret=’ .urlencode($secretKey) . ‘&response=’ . urlencode($captcha);
$response = file_get_contents($url);
$responseKeys = json_decode($response,true);
// should return JSON with success as true
if($responseKeys[“success”]) {
echo ‘<h2>Thanks for posting comment</h2>’;
} else {
echo ‘<h2>You are spammer ! Get the @$%K out</h2>’;
}
?>
try out the demo to see how it works.
